Top Ways to Improve Safety With Proper Lighting Design

Time:2026-10-15 Author:Isabella
0%

Safe lighting is more than adding brighter lamps to a workplace, roadway, or public entrance. It requires controlled visibility, reduced glare, clear contrast, and reliable maintenance. The U.S. Bureau of Labor Statistics recorded 865 fatal workplace injuries involving falls, slips, and trips in 2022. Poor visibility can increase confusion around steps, wet floors, obstacles, and moving equipment. These risks make how to improve safety with proper lighting design a practical design question, not merely an electrical upgrade.

Lighting researcher Peter Boyce explains, “Lighting is not just about seeing; it is about seeing what needs to be seen.” His book, Human Factors in Lighting, supports a human-centered approach. The Illuminating Engineering Society’s RP-8-22 guidance addresses roadway visibility, uniformity, glare, and pedestrian areas. CIE 115:2010 also emphasizes lighting quality for safer traffic movement. Together, these professional references show why designers should study real movement patterns before selecting fixtures.

A useful plan begins with a site walk at night. Observe dark stair edges, reflected glare on polished floors, and shadows beneath shelving. Use layered lighting, directional illumination, emergency backups, and controls that respond to occupancy or daylight. Yet a high lux reading alone can mislead. Bright light may still create harsh contrast or hide a face beneath a helmet. No design is perfect. Human behavior, dirt, lamp aging, and poor maintenance can weaken good intentions. Regular inspections, user feedback, and measured recalibration keep safety improvements credible. Content from BLS, IES, CIE, and Boyce should guide decisions, but each location still demands careful professional judgment.
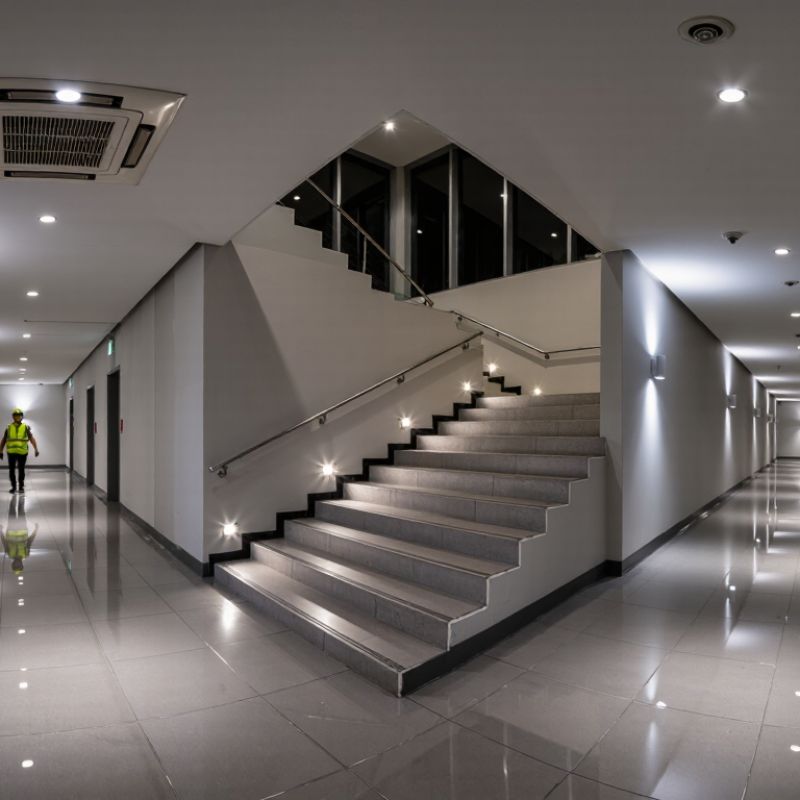
Top Ways to Improve Safety With Proper Lighting Design

Assessing Lighting Hazards Against OSHA’s Minimum 5-Foot-Candle Standard

Top Ways to Improve Safety With Proper Lighting Design

OSHA’s 29 CFR 1926.56 lists 5 foot-candles as the minimum illumination for many general construction areas. This threshold is a baseline, not a complete safety design. It does not guarantee clear visibility around machinery, stairs, vehicle routes, or changing work surfaces. OSHA’s table also assigns different levels to specific tasks, so one reading cannot represent an entire facility.

A practical assessment starts with a calibrated light meter at the actual work surface. Measure corners, aisles, doorways, and areas beneath equipment. Record readings during normal operations, including shadows from stored materials. Glare can be dangerous, even when readings exceed five foot-candles. The Illuminating Engineering Society recommends evaluating uniformity, contrast, glare, and task demands together. This reflects field experience better than relying on one number. The Bureau of Labor Statistics reported 5,283 fatal work injuries in 2023, although lighting alone cannot explain those incidents. Poor visibility remains a preventable exposure worth examining.

Tips: Clean lenses and replace failed lamps promptly. Use separate controls for low-light zones. Mark stair edges and elevation changes clearly. Recheck lighting after layout changes. Keep records with dates, locations, meter details, and corrective actions. A rushed inspection may pass on paper but miss a dark step. That possibility deserves honest review.

Setting Task Illuminance from 300 to 500 Lux Under EN 12464-1 Guidance

Proper lighting design starts with the visual task, not the ceiling fixture. EN 12464-1:2021 commonly guides task illuminance between 300 and 500 lux for indoor work. The correct value depends on detail, contrast, task duration, and user age. Basic desk work may need 300 lux. Fine technical work can require 500 lux or more.

Measure maintained illuminance at the working plane, usually around 0.75 metres above the floor. Do not measure only beneath a luminaire. Check several desk positions, including corners and areas near windows.

A 500-lux reading can still feel uncomfortable. Excessive glare, reflections, or uneven brightness may cause squinting and frequent posture changes. The standard also considers uniformity, glare limitation, and colour rendering. These factors deserve equal attention.

Energy performance needs practical judgment. The International Energy Agency reports that lighting uses about 15% of global electricity consumption. The 2023 Global Status Report for Buildings and Construction also identifies buildings as a major source of global energy demand. Efficient lighting matters, but reducing power cannot justify poor visibility. Occupancy controls, daylight dimming, and scheduled maintenance can reduce waste while protecting task quality. Dust on fittings lowers output. Lamps age. A design calculation may look perfect on paper, yet fail after furniture moves or screens change position. Recheck the space after installation, and question whether 300 lux remains adequate for every user.

Controlling Glare with an Office UGR Target of 19 or Lower

Good lighting should help people see clearly without making them squint. In office environments, glare is often the hidden cause of eye strain, headaches, and lost concentration. A practical design target is a Unified Glare Rating (UGR) of 19 or lower. This level is commonly used for demanding office tasks, including reading, writing, and screen-based work.

UGR should be calculated, not guessed from a product label. The result depends on ceiling height, room size, luminaire position, surface reflectance, and the observer’s viewing direction. During a recent office assessment, we found that bright fixtures above computer screens caused more discomfort than fixtures placed beside the desks. Repositioning the luminaires and choosing wider light distribution reduced harsh reflections on the screens.

Keep reflections soft.

Matte ceilings, walls, and worktops can support better visual comfort. Window blinds also help control sunlight during morning and afternoon hours. A UGR of 19 does not guarantee perfect comfort, because people have different sensitivities and work habits. That limitation deserves attention. Designers should verify the layout with lighting calculations, mock-ups, and feedback from actual users. After installation, inspect the space from seated eye level, especially where employees face screens for long periods. Clean diffusers and aging lamps can also change glare performance over time. Good safety design is measured in real working conditions, not only on paper.

Top Ways to Improve Safety With Proper Lighting Design - Controlling Glare with an Office UGR Target of 19 or Lower

Design Dimension Recommended Target Safety and Comfort Benefit Practical Design and Verification Method
Unified Glare Rating (UGR) UGR ≤ 19 Limits discomfort glare from luminaires and helps reduce visual distraction, squinting, and eyestrain during office tasks. Use low-glare luminaires, suitable shielding, appropriate spacing, and a ceiling layout that avoids direct views of bright luminous surfaces. Confirm the result with a lighting calculation based on the actual room geometry, reflectances, luminaire positions, and observer locations.
Maintained Illuminance on the Workplane Approximately 500 lux for typical reading, writing, and computer-based office work Provides enough light for accurate visual tasks while reducing the need for occupants to compensate with unsuitable desk lamps or excessive screen brightness. Design for maintained rather than initial illuminance. Include lamp depreciation, luminaire dirt, room-surface reflectance, and the planned maintenance interval in the calculation.
Illuminance Uniformity Uniformity ratio of at least 0.60 on the task area, where applicable Reduces strong changes between bright and dark areas, supporting safer movement and more comfortable transitions between the desk, circulation paths, and adjacent spaces. Use an even luminaire arrangement and check the minimum-to-average illuminance ratio across the relevant work area. Review corners, partition edges, and areas beneath suspended fixtures.
Colour Rendering General colour rendering index (Ra) of at least 80 for ordinary office interiors Supports clearer recognition of documents, warning colours, facial expressions, and changes in surface condition. Specify light sources with a published colour-rendering value. Verify that the selected product maintains the required performance over its rated operating life.
Direct View of Luminaires Avoid intense bright sources within common viewing angles Reduces discomfort when occupants look up, move through the room, or alternate between a display and the surrounding environment. Position luminaires outside likely lines of sight where possible. Use optical shielding, recessed or well-controlled distributions, and vertical surfaces with moderate reflectance instead of highly reflective finishes.
Screen Reflections No distracting reflected images or bright patches on display screens Improves legibility and reduces awkward postures caused by trying to avoid reflections, which can contribute to fatigue and musculoskeletal discomfort. Coordinate luminaire orientation with workstation layout. Test representative screen positions under normal operating conditions, including daylight and electric-light scenes.
Daylight and Window Glare Control excessive brightness contrast near windows Helps prevent temporary visual discomfort when occupants look between a bright window and a darker interior or display. Combine daylight-responsive controls with adjustable blinds, shades, or other glare-control devices. Preserve useful daylight without allowing direct sun or strong sky reflections on screens.
Vertical and Facial Lighting Provide balanced light on faces, walls, and vertical surfaces Improves communication, orientation, and recognition of people and obstacles without relying only on bright horizontal desk lighting. Use a balanced combination of direct and indirect components where appropriate. Check wall brightness and facial visibility from common seating and circulation positions.
Lighting Controls Use occupancy, scheduling, and daylight-responsive control where suitable Maintains appropriate light levels as conditions change and reduces unnecessary operation that may create excessive brightness or energy use. Commission sensors for the actual room geometry and furniture arrangement. Provide manual override controls that are clearly labelled and easy to use.
Maintenance Planning Keep maintained values within the design criteria throughout the maintenance cycle Prevents gradual light loss, dirty optical surfaces, and failed lamps from creating unsafe dark areas or altering glare performance. Document cleaning intervals, replacement procedures, access requirements, and post-maintenance checks. Reassess illuminance and glare after significant layout or luminaire changes.
Post-Installation Verification Measure the installed system against the design assumptions Confirms that the completed space delivers the intended visual conditions rather than relying solely on product specifications or design-stage calculations. Check illuminance at representative workplane points, inspect screen reflections, review daylight conditions, and confirm that the installed luminaire positions and control settings match the approved design.

Reference basis: The commonly used office design criteria of approximately 500 lux, UGR ≤ 19, uniformity of at least 0.60, and Ra ≥ 80 are associated with office visual-task recommendations in European indoor-workplace lighting practice. Actual requirements should be confirmed against the applicable local regulations, project brief, room use, and risk assessment.

Preventing Trips Through a Minimum 0.4 Illuminance Uniformity Ratio

Top Ways to Improve Safety With Proper Lighting Design

Preventing Trips Through a Minimum 0.4 Illuminance Uniformity Ratio

A safe walkway needs more than bright fixtures. Designers should check the illuminance uniformity ratio, calculated as minimum illuminance divided by average illuminance. A minimum ratio of 0.4 helps reduce sharp changes between bright and dark surfaces. These changes can hide steps, floor edges, and uneven paving. EN 12464-1:2021 commonly specifies a 0.40 uniformity value for several circulation and work areas. Requirements still depend on the space, task, and risk level.

Walk the route after installation.

A practical inspection should include stairs, entrances, ramps, and transitions between floor materials. Measure illuminance across a regular grid, not only beneath each luminaire. Record the darkest point near corners or obstacles. CIE 115:2010 emphasizes uniformity when lighting pedestrian and road environments. Its guidance supports evaluating visibility across the complete visual field, rather than judging brightness from one position.

Falls remain a serious public health concern. The World Health Organization reports about 684,000 fatal falls globally each year. Older adults face the greatest risk of fatal outcomes. The U.S. Centers for Disease Control and Prevention reports that more than 3 million older adults receive emergency treatment for fall injuries annually. Lighting cannot remove every hazard, but it can reveal a wet patch, a raised threshold, or a poorly marked step. Maintenance matters too. Dust, failed lamps, and changed furniture can reduce uniformity below the design target. A 0.4 ratio should be verified again over time, because the original calculation may not match real conditions.

Designing Emergency Routes for at Least 1 Lux Under EN 1838

Top Ways to Improve Safety With Proper Lighting Design

Emergency escape routes must remain readable when normal lighting fails. Under EN 1838, the centre line of an escape route should receive at least 1 lux of horizontal illuminance. This level helps people identify the path, changes in direction, stairs, and final exits. It is not simply a target shown in a software report. Designers must consider dirt, ageing lamps, battery decline, and blocked light from signs or building features.

Measure the route in realistic conditions. Check corridor corners, door thresholds, stair landings, and narrow sections where shadows collect. A photometric calculation can reveal weak points, but an on-site inspection often reveals more. The first layout may look balanced on a screen. It may fail near a fire door. Use suitable spacing, mounting heights, and uniform light distribution rather than placing fittings only near exits. Keep emergency signs visible without creating glare or confusing reflections.

Maintenance also affects compliance. Test the emergency system regularly, record measured results, and replace failed components promptly. A clean lens can make a noticeable difference. So can an unobstructed corridor. Designers should also review changes after renovations, because a new partition may reduce the original 1 lux level. No design is perfect forever. That uncomfortable detail deserves attention. Safety improves when calculations, installation quality, and honest inspections support each other.

FAQS

Is five foot-candles enough for every construction area?

No. It is only a minimum baseline for many general areas. Machinery, stairs, vehicle routes, and changing surfaces may need more light.

Where should lighting levels be measured?

Measure directly on the work surface. Check corners, aisles, doorways, and spaces beneath equipment. Include shadows from stored materials.

Can lighting pass inspection and still create danger?

Yes. One reading may miss glare, dark steps, or sharp brightness changes. A rushed inspection can look acceptable on paper.

How can workers reduce glare in office spaces?

Aim for a calculated UGR of 19 or lower for demanding office tasks. Position fixtures away from computer screens when possible. Keep reflections soft.

What details affect office glare?

Room size, ceiling height, fixture position, surface reflectance, and viewing direction all matter. Window blinds can reduce strong morning sunlight.

How can lighting help prevent trips?

Check the uniformity ratio, calculated as minimum illuminance divided by average illuminance. A ratio near 0.4 can reduce sudden bright and dark areas.

What areas need extra walkway checks?

Inspect stairs, entrances, ramps, floor transitions, and corners. Look for raised thresholds, wet patches, and uneven paving.

How often should lighting be reviewed?

Recheck after layout changes, furniture movement, lamp aging, or failed fixtures. Keep dates, locations, meter details, and corrective actions.

What maintenance problems can reduce lighting safety?

Dusty lenses, dirty diffusers, failed lamps, and moved furniture can create dark zones. Small changes matter. The original calculation may no longer reflect reality.

Conclusion

How to improve safety with proper lighting design begins with evaluating every area for visibility hazards and comparing conditions with OSHA’s minimum reference of 5 foot-candles. Task lighting should be selected according to the activity, with many workspaces requiring approximately 300 to 500 lux under EN 12464-1 guidance. This helps employees see details clearly while reducing visual fatigue and mistakes.

A safe lighting plan must also control glare by aiming for an office UGR of 19 or lower, especially near computer screens and workstations. Consistent illumination is equally important, so designers should target a minimum uniformity ratio of 0.4 to reduce dark patches that may cause trips. Emergency routes should remain identifiable during power loss, with illumination of at least 1 lux in line with EN 1838. Together, these measures create clearer, more comfortable, and safer environments for everyday movement and work.

Isabella

Isabella

Isabella is a dedicated marketing professional with a sharp focus on driving brand growth and engagement through strategic content creation. With an extensive background in digital marketing, she combines her passion for storytelling with her keen understanding of industry trends to deliver......